Technical Resources
Educational Resources
APM Integrated Experience
Connect with Us
In a perfect world, we wouldn’t need to look at error logs. But until we get there, this blog will teach you how to set up error logs on your WordPress site(s). Luckily, the WordPress ecosystem always has a solution to your problem hidden somewhere. All you need is a guide.
If you have several WordPress sites and want to keep track of error logs across all of them, look no further. This post will show you how to monitor your WordPress installations like a pro.
The WordPress Activity Log is a comprehensive and easy-to-use activity log plugin. This plugin collects and structures logs for various events on your WordPress website. An event is characterized by its severity, object, message, or timestamp and represents various actions users perform on your site, like logging in, creating a post, or changing a theme. Visit the official WP Activity Log site for a thorough explanation of what change each event ID represents and a complete list of all the changes the plugin tracks.
To make a long story short, the WordPress Activity Log plugin is a must-have. Make sure to install the correct WordPress Activity Log plugin from the Plugin directory. Once installed, activate it to follow along without any issues.

Once you’ve installed the WordPress Activity Log plugin, you’re ready to take your WordPress logging experience to the next level with SolarWinds® Loggly®.
Before talking about the integration of your site with Loggly, let’s see what this tool is about in the first place.
Loggly is a cloud-based service for log aggregation, search, monitoring, log analysis, and collaboration. It allows you to pull in logs from any source and then provides you with the tools to analyze them. This way, you can monitor, investigate, and fix issues in little to no time.
Via their partnership with the WordPress Activity Log plugin, you can import WordPress logs onto their dashboard and use their advanced search, filtering, and analyzing capabilities. The exciting thing is you can do this for multiple sites, which means you can now see everything in one place. This is why you need Loggly.
If you’re interested in trying out Loggly for yourself, they offer a risk-free, limited-time trial period.
Once you’ve set up your Loggly account, you’ll want to sign in and generate a Customer Token. You can do this from the Loggly home page by clicking the Logs menu in the sidebar, then the Source setup button, and finally selecting the Customer Tokens tab. From there, create a new token by clicking Add New. This generates a token you’ll use later.
Now, you’ll head back to WordPress to integrate it with Loggly. Feel free to use your WordPress installations to try out the configuration process. Once you’re comfortable completing one setup, the others are a piece of cake. With that out of the way, click Integrations from the WordPress sidebar and then Create a Connection to follow along.
NOTE: The integration feature is only available in the paid version of the WordPress Activity Log plugin. However, they do offer a 14-day free trial you can use.
The WordPress Activity Log plugin makes the integration process easy with a simple, intuitive Connection wizard. Follow the steps below to integrate WordPress and Loggly using the wizard.

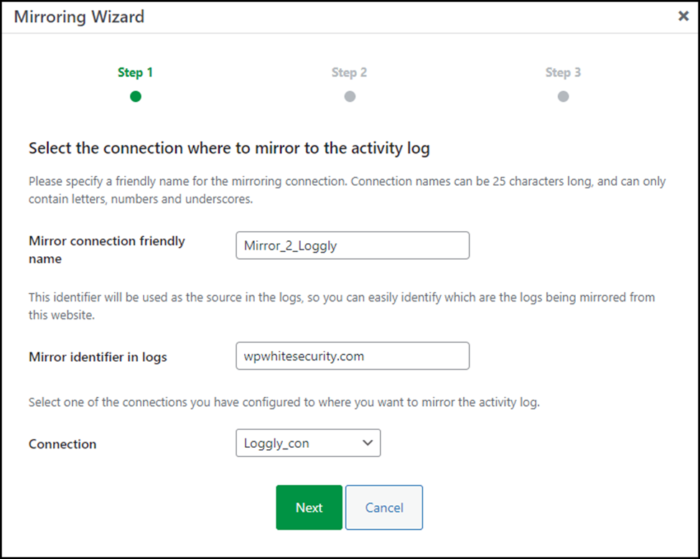
After setting up a connection, you have to set up a Mirror, which is what sends the error logs collected through WordPress to Loggly. You do this via a simple Mirroring wizard.
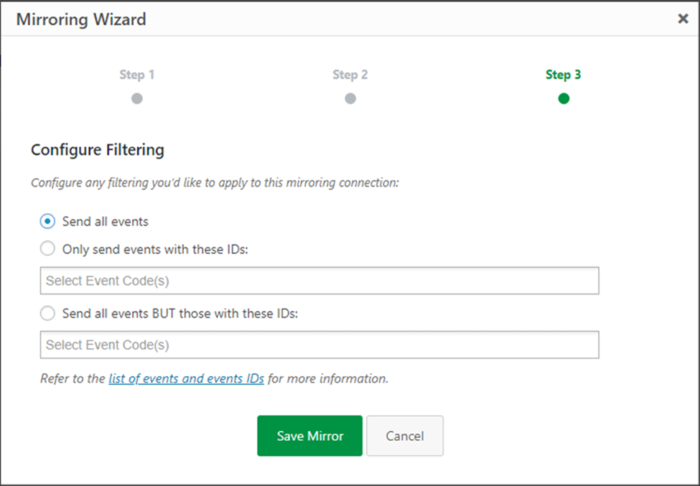
Once you save your mirror, wait a few minutes, and then check the Loggly dashboard to see your logs coming in. Sometimes, a page refresh is necessary. If you don’t see any logs after a considerable period (say ten minutes), review the mirror setup to ensure you didn’t filter out all events (Mirroring Wizard Step 3).
Congratulations! You’ve successfully connected your site to Loggly.
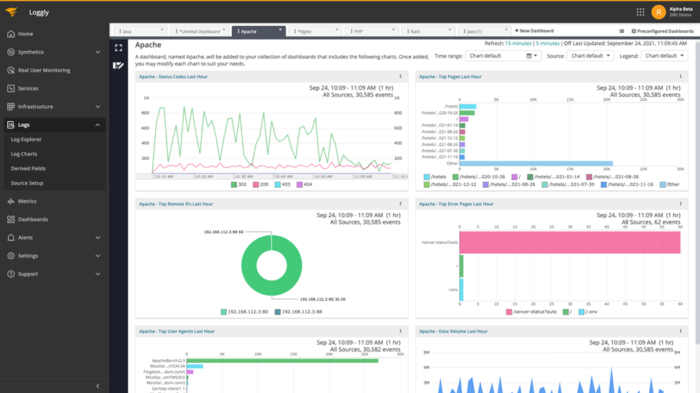
As you can now see, connecting a WordPress site to Loggly is as simple as clicking a few buttons—a process you do only once per site and is easily done on multiple websites. It works the same for multisite network sites as well. The Loggly dashboard provides a single interface to view all your monitored sites. It scales effortlessly and can handle large volumes of log data.
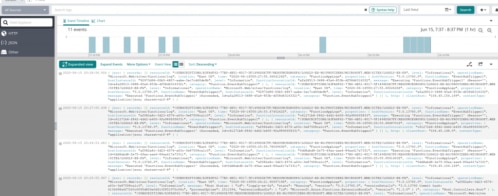
From the Loggly dashboard, you can use powerful query operators to drill down into your WordPress logs.
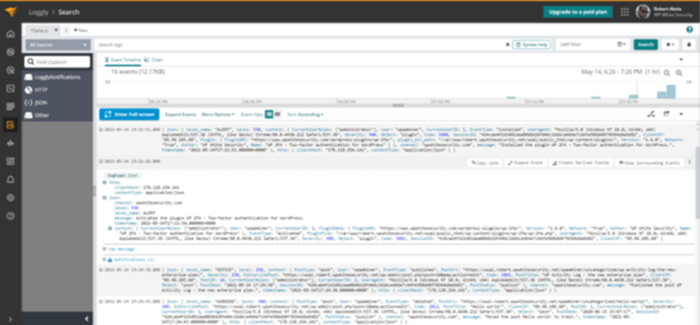
In this example, a WordPress admin user updated the Askimet Anti-Spam plugin. You can see the timestamp of this event, the user’s IP address, and the browser they used. These are all things you can filter through with the help of “Search logs” or the “Field Explorer” on Loggly.
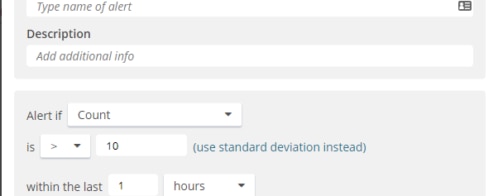
Loggly takes this further by allowing for the creation of charts and graphs to serve as reports. Here’s an example showing login events during the day. This is valuable for tracking end-user experience for the website.
Now you know how to use Loggly to monitor your WordPress installations like a pro. You can also use this powerful setup to:
This is a sample of what you can do with Loggly. Play around with the Loggly dashboard and experiment to discover the power it puts into your hands. That said, what are you waiting for? Try WordPress installation monitoring today with Loggly.
This post was written by Boris Bambo. Boris is a data and machine learning engineer fascinated by technology, education, and business. Feel free to connect with him on LinkedIn.
Looking for something else? You might also want to check out the SolarWinds Log Analyzer